Wednesday, April 30, 2008

Paintball or work?


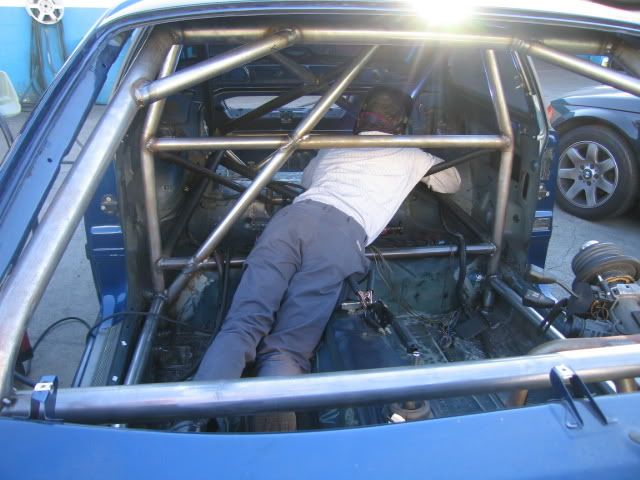
Took a break and went paint balling on Saturday but at least got some work in this weekend....

finished removing all the paint from both inside fenders....and welding all the small holes that were drilled to mount various items in the last 30 odd years of ownership.....
did some seam welding.... fender to firewall
I'm taking my inspiration for my "engine bay cage" from one of the cars from the guys from http://www.skidmarkracing.net

here is his tube design/engine bay

Here is my version of his concept....Im calling this Version 1.0

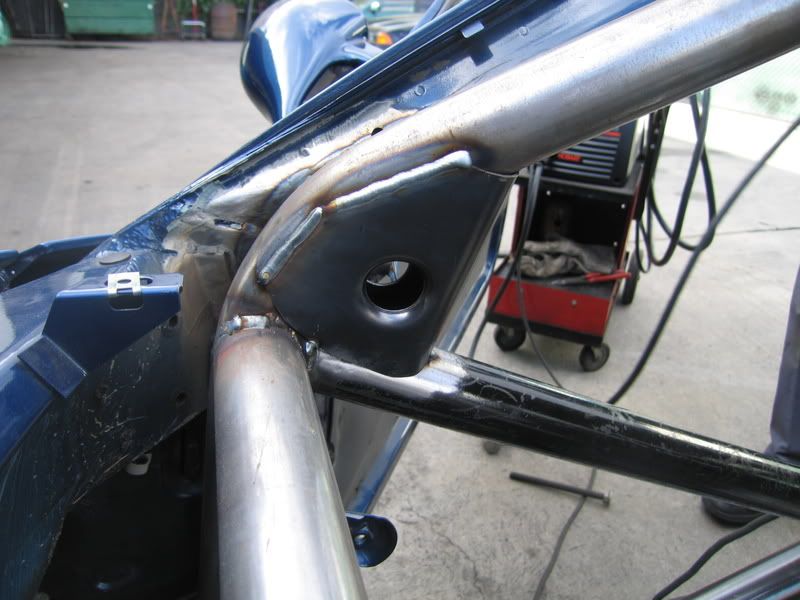
I did not like the way he just "seamwelded" the tubing to the 'shock tower'. I thought I could improve on his idea. This is and old car running really STIFF springs supported by 39 year old spot welds and rusty sheetmetal.

So I decided to construct a 'strut tower' reinforcement box.

Both to strengthen the strut mounting area and to transfer some of the load into the roll cage.

My racing rules state I cannot alter the suspension mounting points. There fore my strut holes are in the same place and I'm not moving the strut mounting point inward like I would like to (to gain more camber). I also would like to raise the strut tower abit to gain suspension travel. But that is also prohibited.

So it is merely a mounting point for the tubes and a reinforcement for the area.came up with this strut tower reinforcement "box"
more detailed view of the reinforcement box/tube mounting... the black circle represents where the tube will be welded to the 'box'
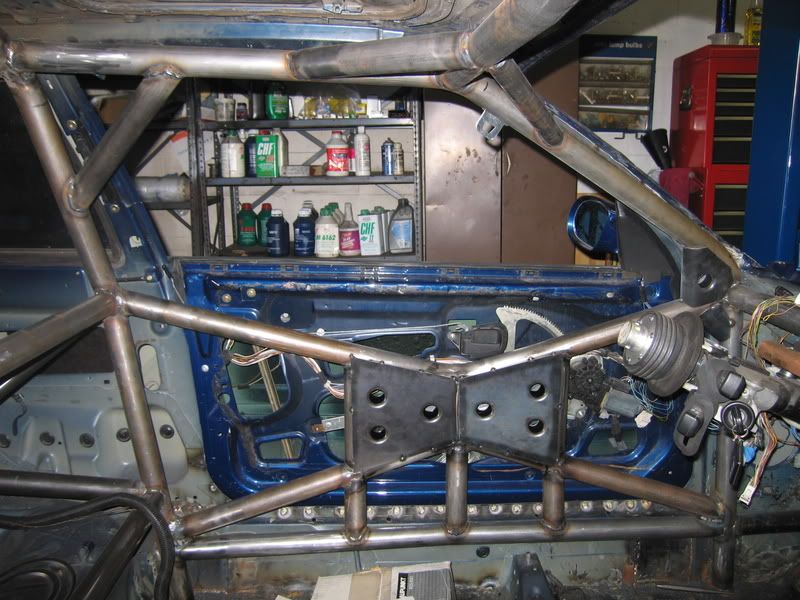
A side view of the design. The most forward tube will reach down and be welded to the frame rail. The 2 triangulated tubes will reach thru the dash and attach to the top dash tube.
I will also weld a "taco gusset" with a nice dimple die to this connection.

Monday, April 21, 2008

Cage modifications started!

We finally finished my friend Dimitri's '95 M3 NASA TT car. We put quite an extensive cage in it. I think he will put up a Project thread here in a few days.

here's a few pics!


here a video of the completed car...
http://www.youtube.com/watch?v=vey-RcRPa5Q

We sprayed it avus blue like the car.....man painting a cage sucks!

We got the car all back together and it's almost ready for it's first test.

Now that we are finished with his car, he is going to help me with mine. Hopefully we can get my car done alot faster now!

I was able to resist the urge to attend the bmw wheel power meet then go to Long Beach grand prix and instead we worked on the car....

We broke out the sawzall and went nutz!!!

Started to prep the engine bay by removing radiator support/firewall sheet metal and the small firewall at the back of the engine bay thanks to a cool new spot weld drill bit and a nice big sawzall!

The radiator will be moved forward and lean a bit. the engine bay is now huge! You could fit a V8 in there! It will have a fan on the backside of it as well.

Began sanding/grinding down all the old crusty paint in the engine bay in prep for welding and fresh paint.

Removed dash support sheet metal as well. This was done as I will be adding a dash bar to connect to my engine bay tubes. I will be fabricating a new dash.

So basically the plan is that I will be adding to my cage alot.

X on the door bars
Bars to tie into the rear subframe
rear strut towers tube and tubes to the diff mount
and finally extending the cage to the front shock towers

...also planed are Tilton pedal setup, mc with brake balance and bias control etc....

oh yeah rebuilding the engine! man...I think I bit off more than I can chew!

Hopefully my good friend Dimitri will lend me a hand and we can bust out all this incredible amount of work!

all the pics CLICK HERE.


I never did paint the engine bay.....

Actually I never touched the whole drive train and engine bay since I bought the car.

So I decided to tackle it all in what I'm calling "phase 2"

-painting engine bay
-reinforcing&restoring all suspension components
-more extensive cage layout
-fresh motor
-new braking "system"
-New and improved dash and wiring.